
 It is that time of year, Spring! I am sure I am not the only one that is itching to go shopping for a fresh new pair of capris and a short sleeve shirt, and to pull out the box of last years apparel. Along with this comes tucking away the dark brown and black purses, and pulling out the colorful and cheery ones.
I am not much of a purse fan (I can hear the gasps). More than once I have left the house with my keys in my front pocket, cell phone in the back, and I'm holding my wallet. My diaper bag is a backpack (Petunia bag, which I LOVE). I really wanted something that was small and simple. Something I could grab if I am going out for a short time with the kids, or something I can still use when I am without kids. Something casual, simple and comfortable to wear. When I saw a swingpack purse, I was in love, and couldn't wait to get started on my very own.
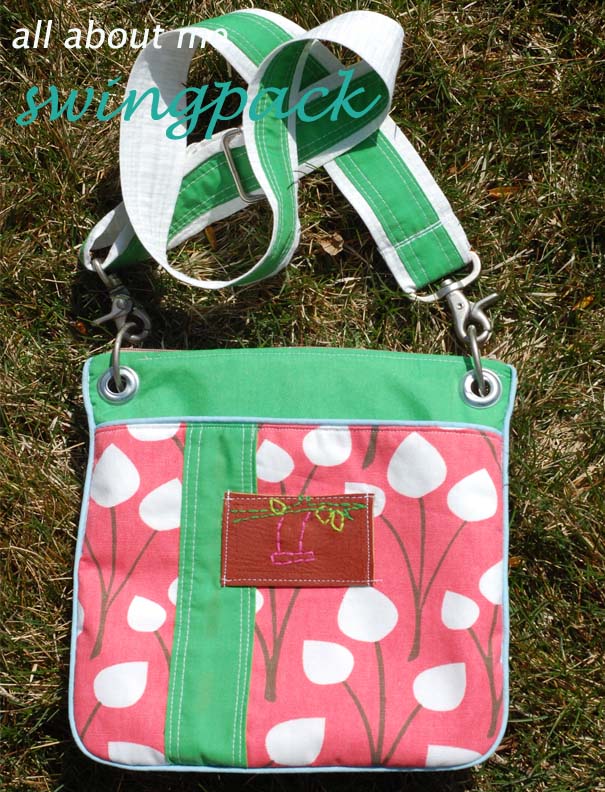
The 'All About Me' Swingpack Purse pattern is free for you, and I'm very excited to share it with you. I know you are going to love this purse as much as I do, and it's so easy and fun to customize and make something perfect for yourself (it's 'All About Me' for that reason), or as a gift for someone else.
The 'All About Me' Swingpack Purse pattern is free for you, and I'm very excited to share it with you. I know you are going to love this purse as much as I do, and it's so easy and fun to customize and make something perfect for yourself (it's 'All About Me' for that reason), or as a gift for someone else.
I would LOVE to know who is downloading this pattern. Would you please make a comment bellow, as simple as, "me", will be just great. Thank you for your help!
Here is what you need to get started:
- 1/2 Yard of Main Fabric
- 1/2 Yard of Coordinating Outer Fabric
- 1/8 Yard of Fabric for the Strap
- 1/2 Yard of Lining Fabric
- 1/2 Yard of Interfacing
- 1 Package of Piping
- Thread
- Old bag with hardware (you will need O-rings, Latches, and a Strap Adjuster)
- 7" Zipper
- 2.5"x2" Leather Piece (for a label)
- "All About Me" Swingpack Pattern Pieces
1. Cut Everything Out
From the purse pattern piece, cut 2 lining, and 2 interfacing. Iron your interfacing pieces to the wrong side of your outer fabrics, and cut out. With the pocket pattern piece, cut 1 lining, and 1 interfacing. Iron your interfacing pieces to the wrong side of your outer fabric, and cut out. Also cut 1 from the decorative strip pattern piece.
2. Decorate your Pocket
Decorate your outer pocket however you want to. I added a green strip. The pattern has this strip. Iron and fold the unfinished edges under (on marked folding line), and then sew it down onto your pocket. I love big stitches so sewed on my strip using two wide stitches on each side (see Image 1).
3. Assemble the Pockets
Baste piping on top of your pocket using your zipper foot (see Image 1). If you want to skip this step, you can sew through all three layers (outer, piping, and lining) at the same time. Arrange the layers so that the right sides of the fabric are facing out, iron, and topstitch along the edge with the piping.
4. Sew the Pockets to the Main Purse Piece
Baste your outer purse piece and pocket together. Sew them like they will look like as the end product (purse outside fabric facing out and pocket outside facing out).
5. Add Piping
Take your piping and sew it all along the edge (see Image 2).

Sew both layers of fabric to your zipper (outer and lining). You want to arrange your fabric so that the outer fabric faces the outside of the zipper, and the lining is facing the underside of the zipper. Line the edges of the fabric up with the edges of the zipper tape, and sew it all together using a zipper foot. If your zipper is longer than the fabric (this is fine, it makes the corners nice on the purse), just leave an equal amount of zipper on either end (see Image 3).
Don't be afraid of zippers, they really aren't too scary! If you are still feeling unsure, Carlee explains technique here with her Wet Bag Tutorial, and Anna from Noodle Head also give awesome picture instructions (for her gathered clutch pattern).
7. Sew it all Together
Arrange your layers so that the right sides of the outer fabric are facing each other, the zipper is in the center, and the right sides of the lining fabric are facing each other. Sew around the perimeter, leaving a gap for turning at the bottom of the lining (see Image 4).
8. Turn and Finish the Bottom of the Lining
Pull the purse right-side-out through the gap in the lining. Handstitch the gap in the lining shut.

9. Assemble the Strap
Take all the hardware off your old bag (see Image 5). Measure how wide the old strap was, and double the width plus 3/8" (approximately 40"x4"). Cut 2 strap pieces based this measurement out your fabric. If you want your strap to have two different fabrics, with one layered on top as a skinnier strip, cut one of the strips about 3/4" narrower (you should compensate for the loss in width by adding this amount onto the wider piece).
10. Add the Hardware
Put the strap adjuster, and latch hardware pieces on your new strap that same way that they were on the old bag (see Image 6). Add grommets to the corners of your purse following the directions on the package (see Image 7). Lastly, attach the latches to the grommets (see Image 8).
Ta-Da! You are finished! I am sure I am like most of you, and I don't sew for myself much at all. I am so glad I took the time to sew this for myself because it is just perfect. It really is a purse that fits me perfectly, my 'All About Me' Swingback.

Happy Spring to EVERYONE!

13 comments:
I'm not much of a purse girl either, I like them and am definitely drawn to them but often times I just carry my things. Now shoes are another story....
Hi!! I would love to make this purse for my nieces but I couldn't get the pattern link to open up. Could you maybe email me the pattern or let me know where I could get to the link a little easier?
Thanks,
d_mandujano (at) yahoo (dot) com
What a great little purse. I love your fabric choices- very springy. I can't get the doc to open either.
Love the purse!! Thanks for linking @"Sew Cute Tuesday"!
Love this bag! I have a black one that I bought that is just like it...but I wanted a springy one! So now I can make it!! Thank you!
Just wanted to let you know that I donwloaded the pattern, because it looks very interesting and I would like to have a go at it. Thanks for sharing. Greetings from Germany!
I downloaded the instructions/pattern. Thanks for sharing with everyone. If I am successful, I will drop you a line with a pic.
Betty said...
I downloaded your tutorial because it is exactly the kind of purse I like to carry now. I'm 70 years old and just want the essentials with me when I shop and have my hands free so a cross body small bag fits my needs. You have designed exactly what I love, thank you!
Loved the purse, but well,I'm not the best seamstress, I'm still learning. I just started a new blog, and posted my version along with a link to your original. Thanks!
http://cheapcraftymomma.blogspot.com/2011/12/christmas-present-for-my-niece.html
Thanks so much for the tutorial! Mine is almost done except for the grommets! Thanks so much for posting this!
Thanks for sharing! I'm looking forward to making mine a place to keep track of my new hearing-aid remote and a handy pocket for stashing my aids when I just want some peace & quiet! =)
Would LOVE to download this pattern tutorial but need to find the link! THANKS. Great job!
Just downloaded the pattern. Looks cute and should be the perfect size for thrift shopping (garage sales, thrift stores, etc) when I do not want to carry a full size purse and want my hands free. Eager to try it.
Post a Comment